From Wikipedia, the free encyclopedia
Content deleted Content added
|
|
|||
| Line 111: | Line 111: | ||
|
:::* 4 × quad [[1.1″/75 caliber gun|1.1″/75 caliber guns]] |
:::* 4 × quad [[1.1″/75 caliber gun|1.1″/75 caliber guns]] |
||
|
:::* 6 × single [[Oerlikon 20 mm cannon|Oerlikon 20 mm cannons]] |
:::* 6 × single [[Oerlikon 20 mm cannon|Oerlikon 20 mm cannons]] |
||
|
:::* 2 × quad [[Mark 15 torpedo]] [[Torpedo tube|torpedo tubes]] 1 ”[[Leander-class cruiser (1931)|Leander-class]]: ”'[[HMAS Hobart (D63)|Hobart]]””’ Top speed: 32.5 knots |
:::* 2 × quad [[Mark 15 torpedo]] [[Torpedo tube|torpedo tubes]] 1 ”[[Leander-class cruiser (1931)|Leander-class]]: ”'[[HMAS Hobart (D63)|Hobart]]””’ |
||
|
Top speed: 32.5 knots |
|||
|
:* 4× twin [[BL 6 inch Mk XXIII naval gun|BL 6 in (152 mm) guns]] |
:* 4× twin [[BL 6 inch Mk XXIII naval gun|BL 6 in (152 mm) guns]] |
||
|
:* 4 × single [[QF 4 inch Mk V naval gun|QF 4 in (102 mm) guns]] |
:* 4 × single [[QF 4 inch Mk V naval gun|QF 4 in (102 mm) guns]] |
||
Latest revision as of 09:11, 10 December 2025


The Battle of Savo Island was part of Guadalcanal Campaign and was fought on 9 August 1942 in the waters around Savo Island by forces of the Imperial Japanese Navy (IJN) and Allies’ Guadalcanal—Tulagi invasion force composed of ships from the United States Navy (USN) and Royal Australian Navy (RAN). The battle resulted in a major Allied defeat, losing four heavy cruisers. The Japanese lost no ships but failed to capitalize on the temporary strategic advantage gained from the battle, leaving the unprotected Allied transports unharmed.
Because the Japanese had the tactical initiative, their forces are listed first.
Japanese order of battle
[edit]


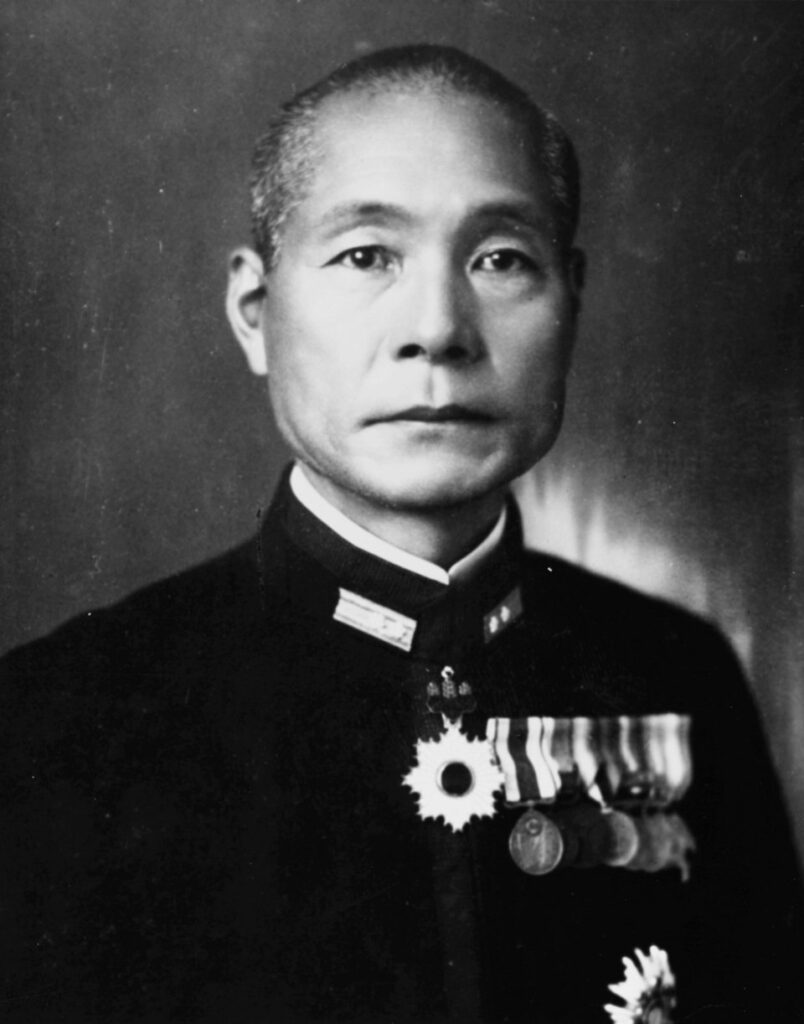
Vice Admiral Gunichi Mikawa in heavy cruiser Chokai
- 8th Fleet
- 1 heavy cruiser
- 1 Takao-class: Chokai (damaged)
- Top speed: 34.25 knots
- Main battery: 10 × 8-inch
- Secondary btty.[a]: 8 × 5-inch
- Anti-aircraft btty.: 8 × 25mm, 4 × 13mm
- Torpedo tubes: 16 × 24-inch
- 1 Takao-class: Chokai (damaged)
- 1 destroyer
- 1 Kamikaze-class: Yūnagi
- Top speed: 37.25 knots
- Main battery: 4 × 4.7-inch
- Anti-aircraft btty.: 2 × 7.7mm
- Torpedo tubes: 6 × 21-inch
- 1 Kamikaze-class: Yūnagi
- 1 heavy cruiser
- Cruiser Division 6
- Rear Admiral Aritomo Gotō in heavy cruiser Aoba
- 4 heavy cruisers
- 2 Furutaka-class: Furutaka, Kako (sunk by a submarine near Rabaul on 10 August)
- 2 Aoba-class: Aoba, Kinugasa (damaged)
- Top speed: 33 knots
- Main battery: 6 × 8-inch
- Secondary btty.: 4 × 4.7-inch
- Anti-aircraft btty.: 8 × 25mm, 4 × 13mm
- Torpedo tubes: 8 × 24-inch
- 4 heavy cruisers
- Cruiser Division 18
- Rear Admiral Mitsuharu Matsuyama in light cruiser Tenryū
- 2 light cruisers
- 1 Tenryū-class: Tenryū (damaged)
- Top speed: 33 knots
- Main battery: 4 × 5.5-inch
- Anti-aircraft btty.: 1 × 3-inch, 2 × 13mm
- Torpedo tubes: 6 × 21-inch
- 1 Yūbari-class light cruiser: Yūbari
- Top speed: 35.5 knots
- Main battery: 6 × 5.5-inch
- Anti-aircraft btty.: 1 × 3-inch, 2 × 13mm
- Torpedo tubes: 4 × 24-inch
- 1 Tenryū-class: Tenryū (damaged)
- 2 light cruisers
Allied order of battle
[edit]
_in_the_Solomons_1942.jpg)
_passing_through_the_Panama_Canal_in_March_1935.jpg)
_before_World_War_II.jpg)
Rear Admiral Victor Crutchley (RN) in heavy cruiser Australia
- Southern Force
- Captain Howard D. Bode (USN) in heavy cruiser Chicago
- 3 heavy cruisers
- 2 County-class / Kent-subclass:
 Australia[b], Canberra (damaged and scuttled)
- Top speed: 31.5 knots
- Main battery: 8 × 8-inch guns
- Secondary btty.: 8 × 4-inch
- Anti-aircraft btty.: 8 × 2-pounder, 8 × 50-cal.
- Torpedo tubes: 8 × 21-inch
- 2 County-class / Kent-subclass:
- 3 heavy cruisers
-
-
- 1 Northampton-class: Chicago (damaged)
- Top speed: 32.7 knots
- Main battery: 9 × 8-inch guns
- Secondary btty.: 8 × 5-inch/25-cal. dual-purpose
- 1 Northampton-class: Chicago (damaged)
- 2 destroyers
- 2 Bagley-class destroyers: Bagley, Patterson (damaged)
- Top speed: 36.5 knots
- Main battery: 4 × 5-inch/38-cal.[c]
- Anti-aircraft btty.: 4 × 1.1-inch
- Torpedo tubes: 16 × 21-inch
- 2 Bagley-class destroyers: Bagley, Patterson (damaged)
-
- Northern Force
- Captain Frederick L. Riefkohl (USN) in heavy cruiser Vincennes
- 3 heavy cruisers
- All New Orleans-class: Vincennes (sunk), Astoria (sunk), Quincy (sunk)
- Top speed: 32.7 knots
- Main battery: 9 × 8-inch guns
- Secondary btty.[a]: 8 × 5-inch/25-cal. dual-purpose
- All New Orleans-class: Vincennes (sunk), Astoria (sunk), Quincy (sunk)
- 2 destroyers
- 1 Benham-class: Wilson
- 1 Bagley-class: Helm
- Top speed: 36.5 knots
- Main battery: 4 × 5-inch/38-cal.[c]
- Anti-aircraft btty.: 4 × 1.1-inch
- Torpedo tubes: 16 × 21-inch Eastern Force
- 3 heavy cruisers
- Rear Admiral Norman Scott (USN) in light cruiser San Juan
- 2 Light cruisers
- 1 Atlanta-class: San Juan
- Top speed: 32.5 knots
- 1 Atlanta-class: San Juan
- Top speed: 32.5 knots
- ^ a b Secondary armament broadside typically half the number of total guns due to side mounting.
- ^ Not involved in the battle as it was delivering Rear Admiral Crutchley to a meeting with Rear Admiral Turner, who was in the command of the entire Task Force 62.
- ^ a b Assuming by that time typical armament of 4 guns on Farragut through Gleaves class destroyers (as per Office of Naval Intelligence: “ONI 222-US, United States Navy Vessels” for example).
- Frank, Richard B. (1990). Guadalcanal: The Definitive Account of the Landmark Battle. New York: Penguin Group. ISBN 0-14-016561-4.
- Lundstrom, John B. (2005). First Team and the Guadalcanal Campaign: Naval Fighter Combat from August to November 1942 (New ed.). Annapolis, Maryland: Naval Institute Press. ISBN 1-59114-472-8.
- Lundstrom, John B. (2006). Black Shoe Carrier Admiral: Frank Jack Fletcher at Coral Sea, Midway, and Guadalcanal. Annapolis: Naval Institute Press. ISBN 1-59114-475-2.
- Morison, Samuel Eliot (1958). The Struggle for Guadalcanal, August 1942 – February 1943. History of United States Naval Operations in World War II. Vol. 5. Boston: Little, Brown and Company. ISBN 0-316-58305-7.
- Silverstone, Paul H. (1970). U.S. Warships of World War II. Garden City, NY: Doubleday and Co. ISBN 0-8702-1773-9.
- Watts, A. J. (1966). Japanese Warships of World War II. Shepperton, Surrey: Ian Allan Ltd. ISBN 0-7110-0215-0.